Out of all the things I must do to keep my Etsy shop running, product photos are my least favorite. I even prefer counting inventory and doing taxes over taking new product photos. Unfortunately, it’s one of the most important things to master to get people to click on your listings. The photos you publish are the first impressions your customers have of your shop, and you want them to be good. Don’t waste your time posting bad photos. Take the time do it right. I still feel I have room for improvement in my photos, but I thought I’d share a couple of things I learned.

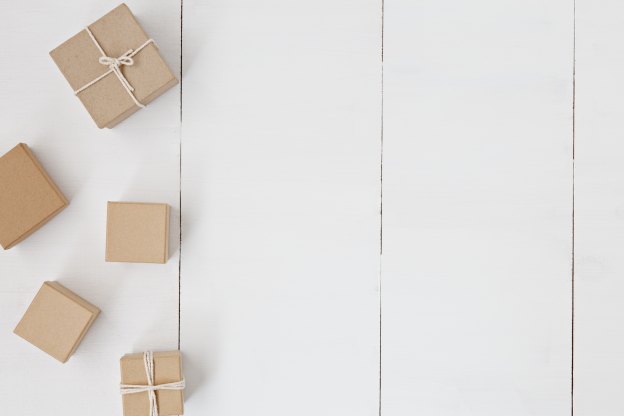
This is the first background I used when I opened my shop. I wanted color and texture, but this look wasn’t impressive and didn’t represent my brand.
First, don’t be hard on yourself when you first start and you’re not getting it right. It takes a lot of practice. I took thousands of photos in all different types of lighting on all different types of settings from all different angles before I figured out what I liked.
Second, learn your camera settings and features. I know most Etsy sellers use camera phones for their products, but that doesn’t work for me. I sell big metal disks, arguably one of the hardest things to photograph, so my phone doesn’t cut it. I did hours of internet research to learn what ISO, aperture, shutter speed, and white balance mean. I’ve forgotten most of it now, but I don’t need to know the definitions anymore, just the settings. Write them down somewhere so you never need to research it again.
Third, I have the best results on cloudy afternoons. I used to know exactly what time of day and I needed to take my pictures for the best lighting. Fortunately, it was midafternoon during my daughter’s nap time, and I set up on a table in the playroom. Avoid direct sunlight, it washes out the colors. If it’s not cloudy, go in the shade.

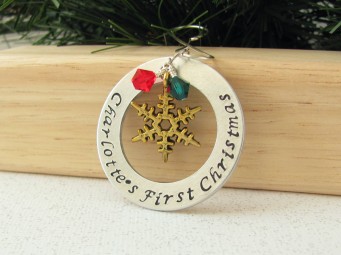
This is the second background I tried. It’s ok, but it’s not attention grabbing. The ornament is lost a little in the wooden block. Some of my listings still have this background, and I plan to update it this summer.
Fourth, get a tripod. They’re not that expensive, and that alone significantly improved my photos and saved me time clicking through and deleting all the blurry ones. This is especially important for jewelry and other items that have a lot of fine detail. No matter how still you are, your hand still shakes a little, especially when it’s tired from holding the camera.
Fifth, learn photo editing. You may take awesome photos, but a little tweaking helps. I use www.befunky.com. It used to offer the features I needed for free, but now I pay for the premium version. I found this to be the easiest site to use, but you can also use photoshop, www.picmonkey.com, www.ribbet.com, or find your own. There are a lot of free ones and you might not need to pay.

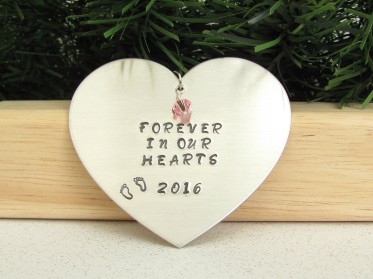
This is the background I use now. I like the contrast with the light ornament and dark green. I also like that the pine branch says Christmas without screaming it since I sell my ornaments year around.
Other stuff:
Etsy recommends clean, simple, white backgrounds. I find most sellers don’t stick to this as their main photo. My personal opinion is that it looks too much like a catalog and corporate. I like to see more personal backgrounds when I shop Etsy. I use the white background as my second or third photo. When I publish a listing, I search for it to see how it looks among all the other listings on the page. Does it stand out? Does it look professional? Does what I’m selling stand out or do you have to guess?
I got tired of living around the best days and times to take pictures, so I bought a small lighting tent. You don’t have to spend a lot of money on them to get good results. It was another learning curve for sure. Had to readjust all my camera settings, but now I can take photos whenever I want, and I have more control over the environment. I noticed this has made my photos look more consistent.
Etsy has room for up to ten photos and recommends using all those slots. I like having at least two photos of the ornament from the front, one of the back if there’s stamping on the back, and I recently added a photo of the ornament next to a quarter for scale. You want the photos you chose to show the customer everything they need to know about your product and how to use it. Many customers don’t look through all the photos, but many more of them don’t read the product descriptions. A customer is more likely to buy something if they don’t have to ask or make guesses about what they’re looking at.
Last, if something isn’t selling, try taking a new photo of it. I’ve had some luck with this advice. I had wine glass charms that weren’t selling, so I changed the background of the photo, and got my first sale for them a few days later. I also had an ornament that got a lot of favorites, but no sales, so I changed the charm on it re-photographed it. It’s not a best seller, but I’ve sold a good amount of them.
I’m thinking about all this now because I plan to redo a lot of my photos this summer. Some of them still have the old background, and some of my listings only have one photo. I want my shop to look cohesive and the amount and types of photos to be consistent across listings. So, while I hate taking product photos, I’ve learned that they are important enough for me to suck it up and just get it done.
Cari
http://www.etsy.com/shop/embervalley
embervalley@hotmail.com